


How to Implement a custom Data Layer in Google Tag Manager
In my last blog, I discussed the benefits of using GTM to provide event driven tag management. I'm now going to explain the basics of how to achieve this by using the Google Tag Manager Data Layer.
The Data Layer is a means to send user and/or page information up to GTM enabling you to achieve rule based tag delivery as well as sending variables to 3rd party tags. The two most common uses for the Data Layer is to push up custom variables and custom events. In this blog I'm going to cover custom variables. Before we can push a variable up to the Data Layer we must first define it in GTM.
Custom Variables
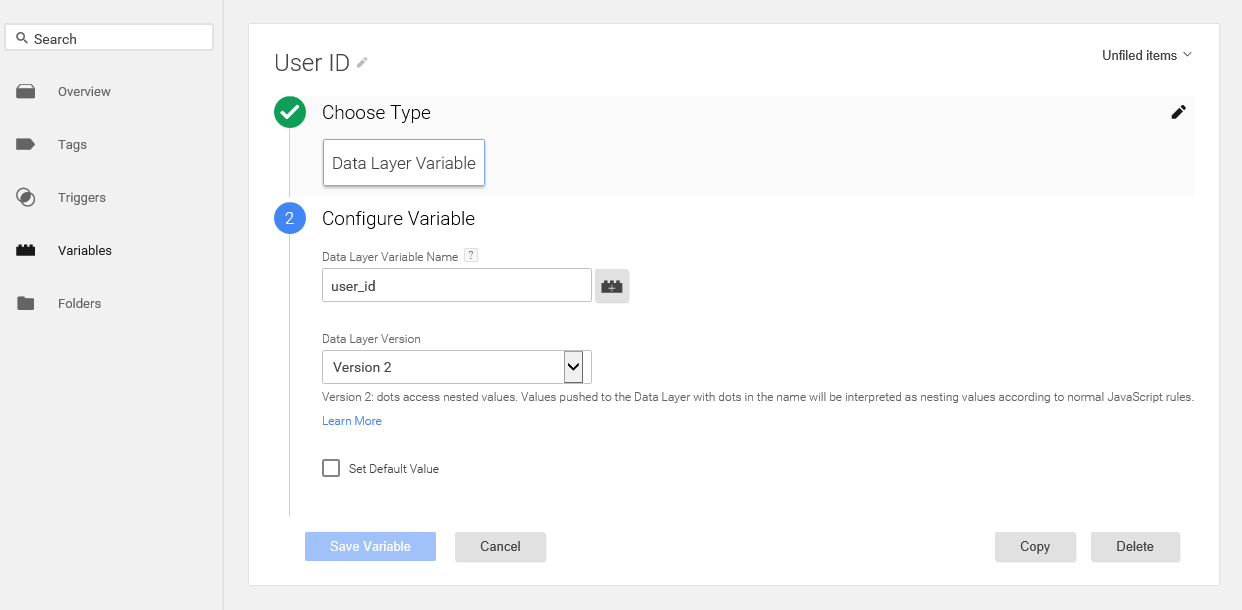
To do this in GTM you need to create a new custom variable with a type of "Data Layer Variable". In my example below I intend to track the identity of the currently logged in user, as the tags which I intend to use later require that a User ID is passed along with every conversion. I have named the variable User ID and specified the Data Layer variable name as user_id. The first name is the name which you will identify the variable as within the GTM interface and the second is the name which you will refer to it as from within the JavaScript, these could be identical if you'd like.
Note that there is an also an option to set a default value to use if this variable isn't present in the DataLayer. This is typically useful if your tags require a specific value to be passed in to indicate n/a as opposed to leaving the parameter null.
Pushing the variables up to GTM
Now that we have defined our variables we can push them into the DataLayer. Lets start by understanding exactly what the Data Layer is. GTM requires you to cut and paste their standard block of JavaScript code into your page source, this will trigger GTM to load and run for that given page. At this point there is already a Data Layer running. The Data Layer is accessible via a page level variable which is named 'dataLayer' (case sensitive). If you open your developer console on a page with GTM running on it and type 'dataLayer' and press enter you will see the following.
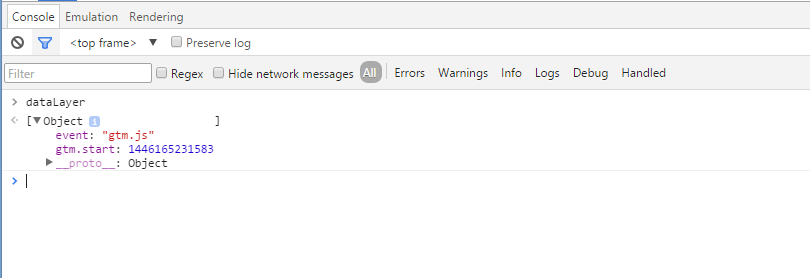
We have a JavaScript object array which has one single object in it. This first object is inserted by GTM by default. GTM watches this the dataLayer variable and every time a new item is added to this array, these changes are pushed up to GTM immediately. So what this means is that batches of data can be pushed up to GTM at varying times within the page's life cycle based on interactions by the user. I'm going to show you the most common scenario which is pushing data up with the initial page load.
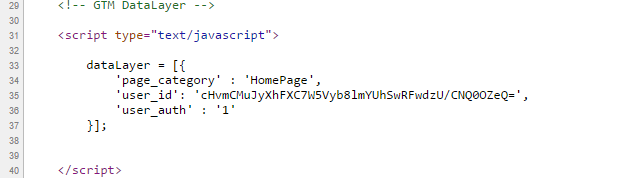
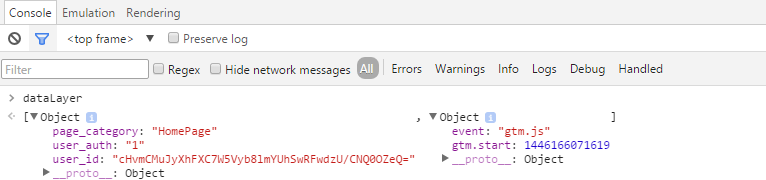
In this script block, I am defining the dataLayer variable and pushing in three custom variables including user_id which we defined in my example earlier. These three variables will be pushed up to GTM as soon as GTM has initialized. If I examine the dataLayer object in the console again, I can see that it now has a second object, which contains the three variables which I defined in the page level script block. At this point the variables have been pushed up to GTM.
Dynamic Tags
Now that we have our Data Layer, we can customise the tags which we serve out of GTM. Below I've created a new tag which is designed to fire on a post conversion page or event, to pass in the user Id and dollar amount spent to the 3rd party system.
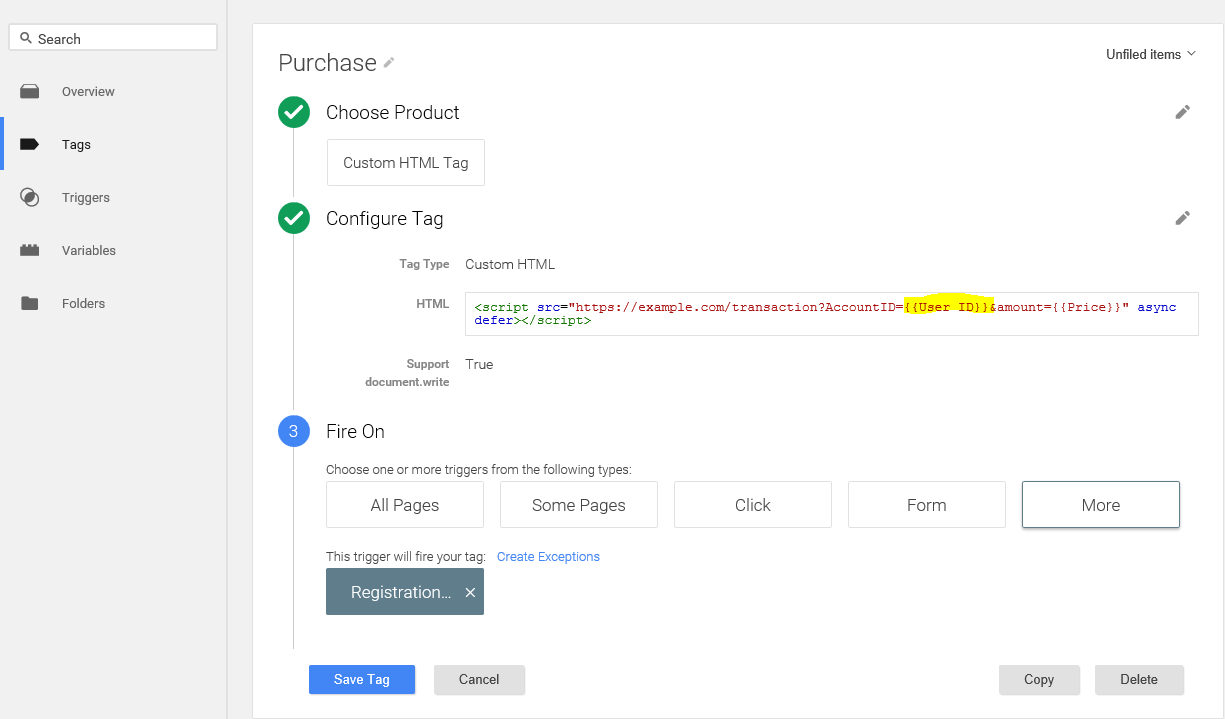
Without taking advantage of the Data Layer this dynamic tag could not have been embedded via GTM, the developer would have had to form the tag script block through code on the server side, which is a mess to maintain and manage.
So far we have only covered setting up page load tags. In my next blog, I will show you how to trigger custom events off AJAX callbacks to eliminate the need for physical thankyou pages.