

Sprucing up the TinyMCE editor in Umbraco 7
The guys at Umbraco did an amazing job with the new look and feel of Umbraco 7’s UI, codename Belle. It’s fast, responsive, easy of the eyes. It’s really hard to find fault with it… unless you’re me.
The TinyMCE editor, also known as the Richtext Editor in the set of Umbraco property editors, doesn’t really hold its weight with the rest of the styles running around the back office. This is likely by design (I hope), as there’s heaps of customisation support baked into the editor as well as into the CMS.
Here’s a look at the editor without any custom styling applied.

Yeah, it’s pretty fugly. Wouldn’t it be great if we could class it up a little (no pun intended)?
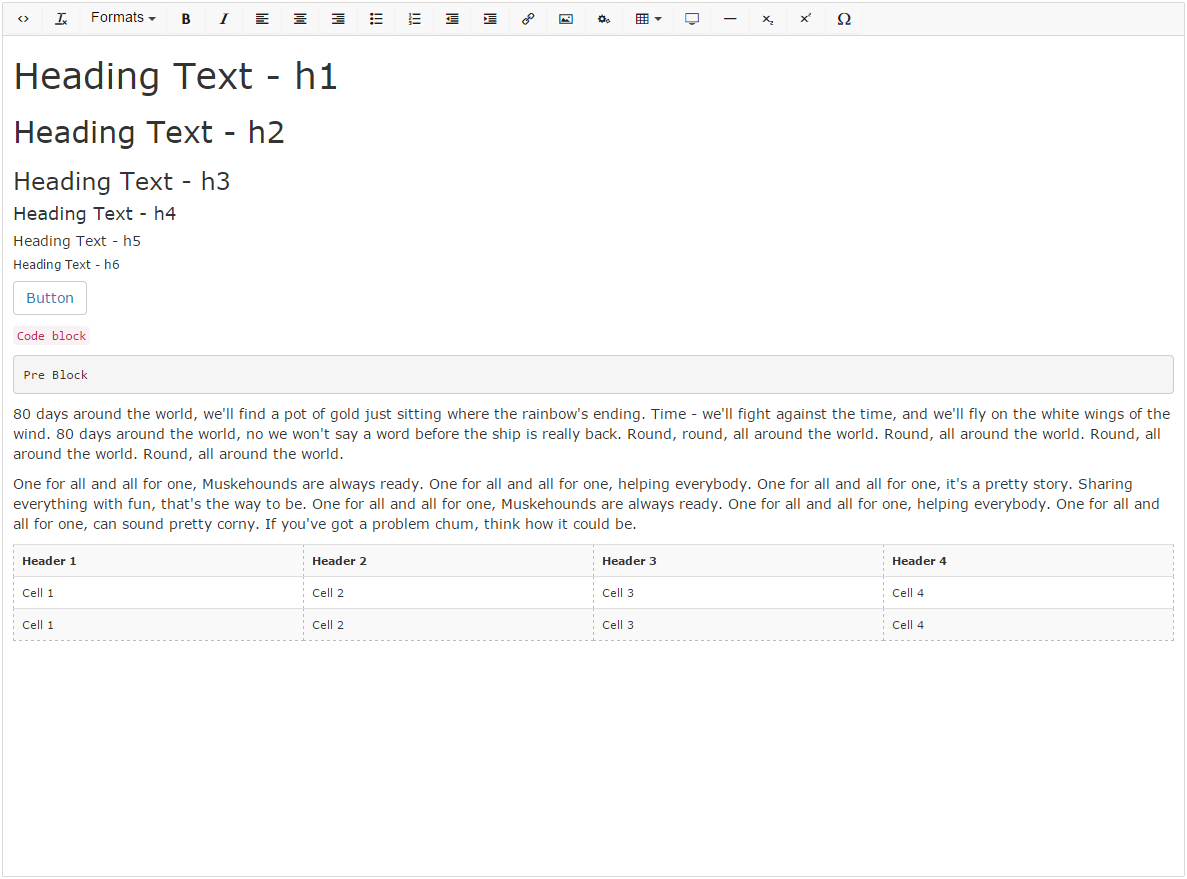
I know, right?! What a difference a little styling makes. Don’t worry, you too can have a Richtext Editor that’s all dressed up and looking fabulous.
A little class and a dash of style
Most of this is just setting up your editor’s stylesheet in the back office, and it's pretty easy.
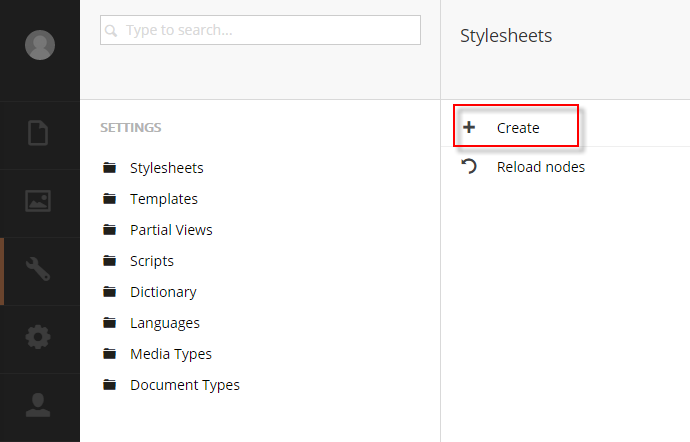
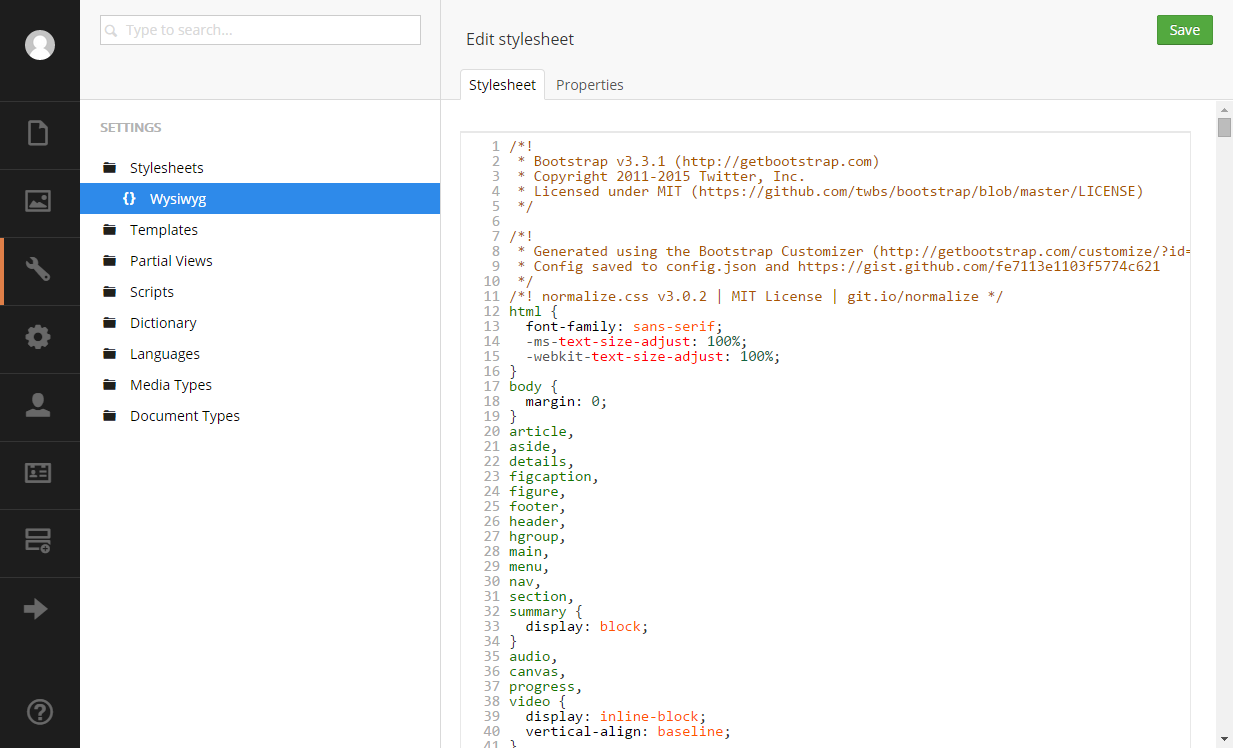
First, create your stylesheet. Do this by navigating to the Settings section in the back office, and choose the create option of the Stylesheets node. I’ve named mine Wysiwyg. Note, this will create an actual CSS file in your project and you may want to add it to your project solution if you’re using Visual Studio.
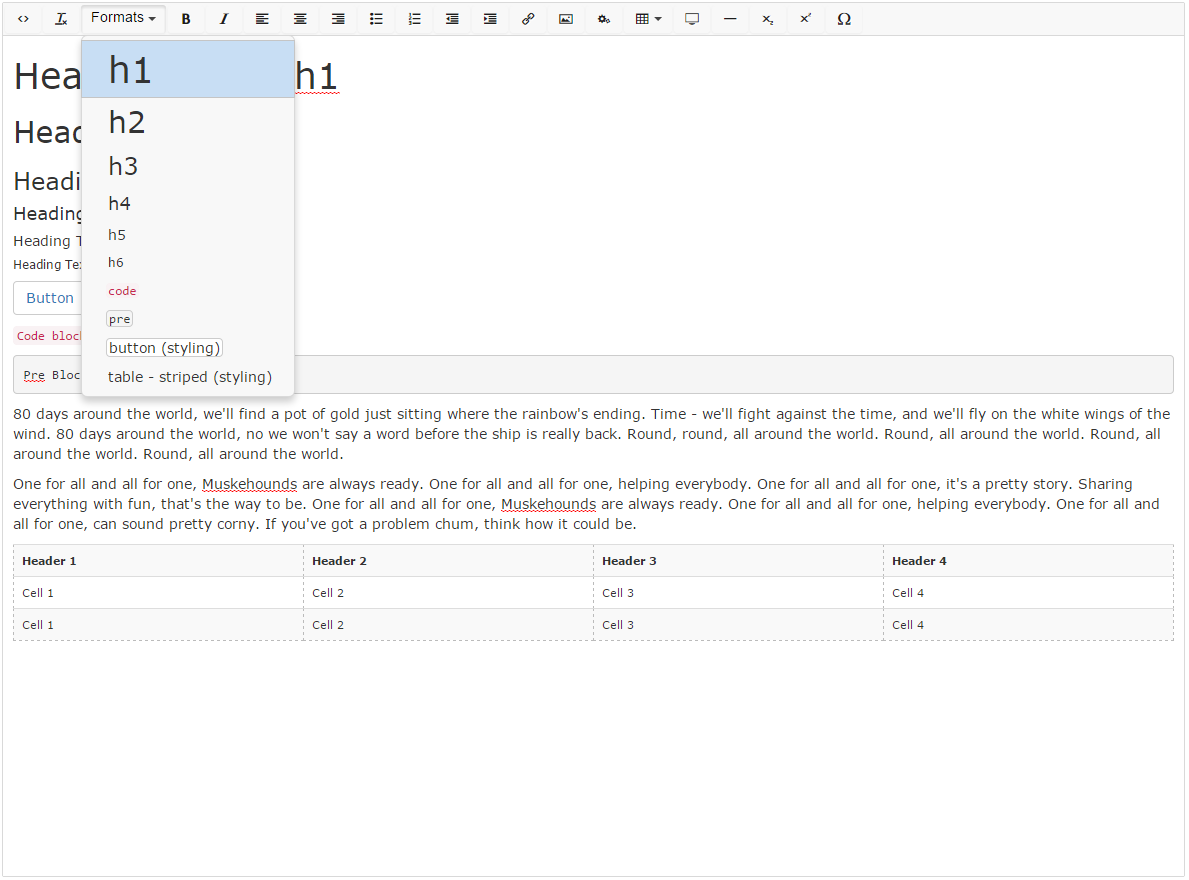
Okay, now, on your new stylesheet node, use the create option to create the following stylesheet properties. Here are the names to use:
- h1
- h2
- h3
- h4
- h5
- h6
- code
- pre
- button (styling)
- table - striped (styling)
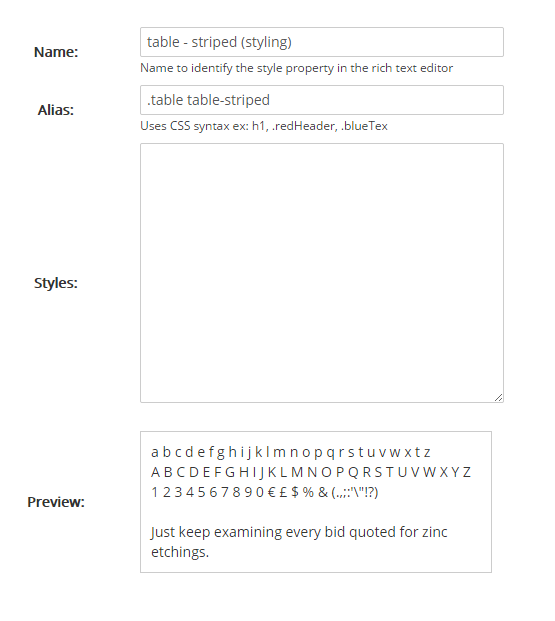
For the last two properties, edit their aliases to the following:
- button (styling) should have an alias of “.btn btn-default”
- table - striped (styling) should have an alias of “.table table-striped”
The lack of periods before the second styles is intentional. Umbraco strips the first one, but will leave the others, so that's why we omit them.
For example, the editor window for table - stiped (styling) should look like this.
Okay, next, a little shortcut with Bootstrap. Go to the Bootstrap customization page, untick all of the Less Files and jQuery Plugins options, and select the following Less Files options:
- Typography
- Code
- Tables
- Buttons
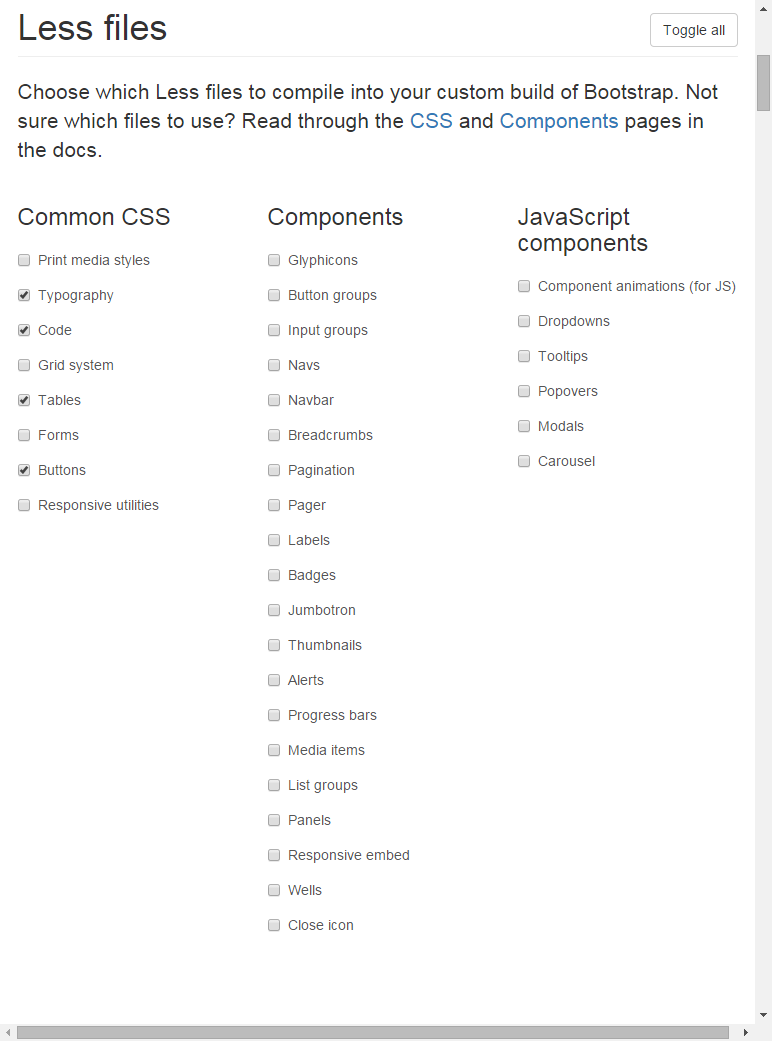
Download that build. You can select more style options when you play around with your own solution, however, for this example, those are all we need.
Back in the Umbraco back office, select your stylesheet in the node tree, and within the text field area of the editor window, paste the contents of the bootstrap.css file you downloaded.
Okay, nearly done with the styles, promise. At the very end of all of those styles in the text field area, add these two extra styles and save the changes:
html { padding-left: 10px; padding-right: 10px; }
mce-content-body { font-size:14px; }
What those last two styles do is add a little extra padding to the side of the editor panel and override the font-size coming in from TinyMCE’s included CSS.
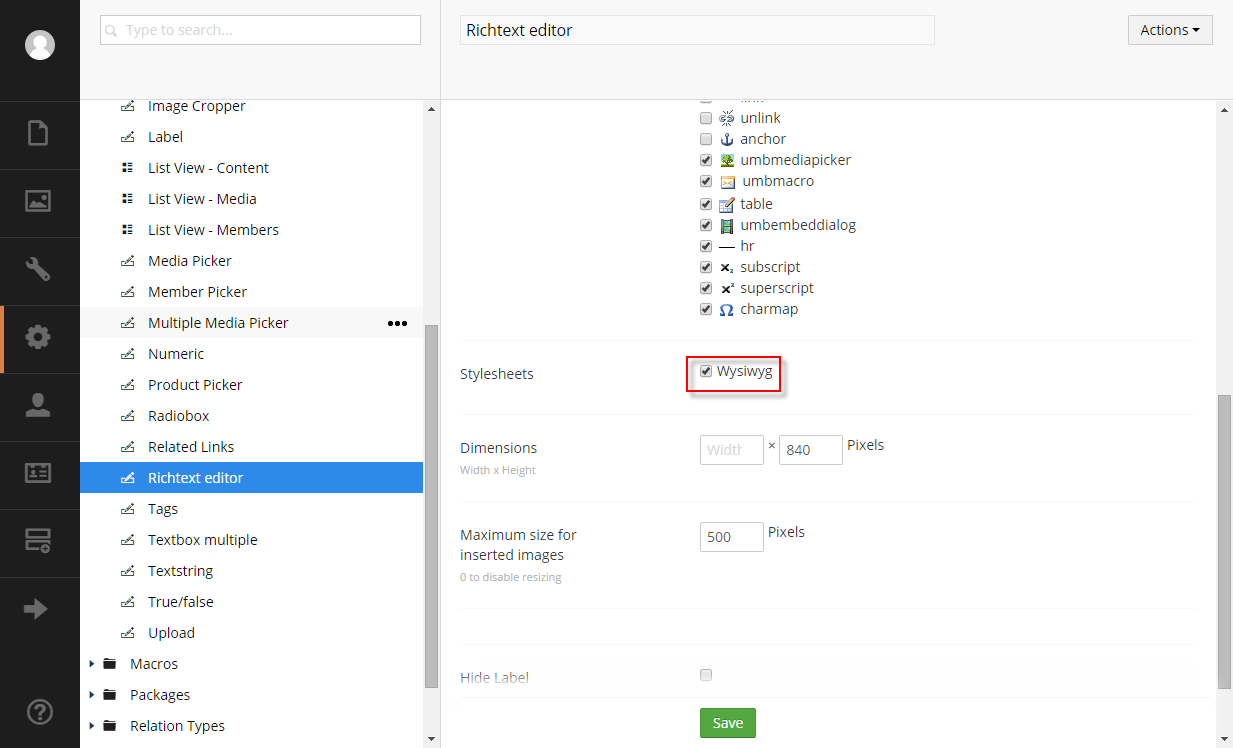
The styles are done. Now, you need to set the Richtext Editor to use the stylesheet.
Go to the Developer section in the backoffice, and under the Data Types node, select the Richtext Editor. Simply select your stylesheet in the Stylesheets list in the editor and save your change.
Excellent, all of the styles are in, and your Richtext editor is setup!
One last thing …
Not all HTML tags are setup to be used with the TinyMCE editor. For instance, the code tag. However, this is easily fixed. Open the tinyMceConfig.config file in the config folder of your project. Add the following text to your validElements node contents:
code[class|align|style]
Remember to add a comma where appropriate as the data is comma seperated. Now TinyMCE will support adding code tags to your HTML.
Have a play
Go to content page that has a Richtext Editor and start playing around with the new styles and elements. They should now all appear in your Format toolbar option in the editor. One thing to note, you may want to clear your browser cache out before applying styles. Enjoy!